Next Previous Up Contents
Next: Time Plot Window
Up: Corner Plot Window
Previous: Corner Navigation

A.4.13.2 Corner Axes Control

The Axes control () for the corner plot window has the following tabs:
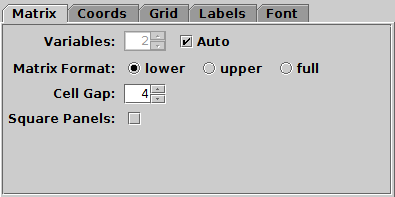
Matrix Tab
Matrix tab of corner Axes control

Matrix tab of corner Axes control

The Matrix tab configures the grid on which the individual plots are placed. It has the following options:
Variables
Sets the number of variables to be compared; that corresponds to the linear size of the plot grid (or size+1 if no histogram-like plots are included). If the Auto box is checked then this value will be determined automatically from the values that are filled in on the Position controllers.
Matrix Format
Configures which cells of the matrix grid will be filled in. Below-diagonal, above-diagonal, or the full matrix can be chosen. Given grid cells will only appear if there are appropriate plot layers specified, i.e. 2-coordinate (scatter-plot-like) plots for the off-diagonal cells and 1-coordinate (histogram-like) plots for the diagonal cells. The available options are:
  • lower: only the lower diagonal part of the matrix is populated, as well as the diagonal if histogram-like elements are present
  • upper: only the upper diagonal part of the matrix is populated, as well as the diagonal if histogram-like elements are present
  • full: all cells of the matrix are populated where present
Cell Gap
Sets the number of pixels between cells in the displayed matrix of plots.
Square Panels
If checked, each of the plotted panels in the matrix will have the same vertical and horizontal dimension. If unchecked, the shape of each panel will be determined by the shape of the overall plotting area.

Coords Tab
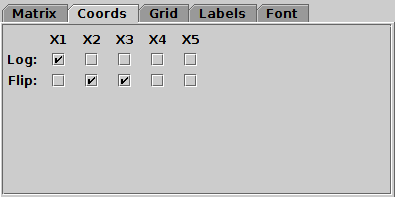
Coords tab of corner Axes control

Coords tab of corner Axes control

The Coords tab controls the axis coordinates. For each currently visible axis there are two checkboxes:
Log
If selected, the coordinates corresponding to this axis are logarithmic, otherwise they are linear.
Flip
If selected, the coordinates corresponding to this axis run in the opposite direction to normal.

Grid Tab
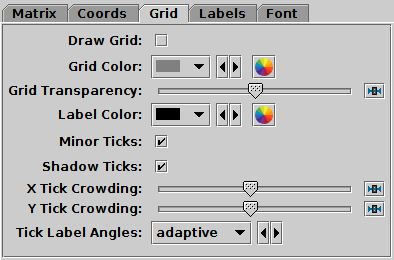
Grid tab of corner Axes control

Grid tab of corner Axes control

The Grid tab configures the appearance of the axis grid in each panel. It has the following options:
Draw Grid
If true, grid lines will be drawn across the plot for every tick mark.
Grid Colour
Selects the colour with which grid lines will be drawn.
Grid Transparency
Controls the transparency of the grid lines, which are drawn over the plot content.
Label Colour
Selects the colour in which axis label text will be written.
Minor Ticks
If set, minor (unlabelled) tick marks will be drawn between the major (labelled) ones.
Shadow Ticks
If set then tick marks without numeric labels are painted along the axis opposite to the primary axis, so that tick marks are visible along all edges not just the ones with numeric labels.
X/Y Tick Crowding
Use the slider to influence how many tick marks are draw on each axis.
Tick Label Angles
Controls orientation of numeric labels on the axes. By default they are drawn angled to accommodate more labels on crowded axes, but you can also choose horizontal. If adaptive is selected, they will be horizontal where possible, but may be angled to accommodate more labels if crowding is high; note this option is currently not perfect and can result in suboptimal border placement.

Labels Tab
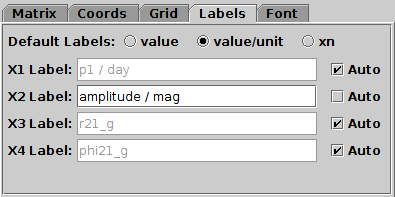
Labels tab of corner Axes control

Labels tab of corner Axes control

The Labels tab controls the text labels on the axes. The axes are labelled according to the text listed for each coordinate X1, X2, .... By default these labels are assigned automatically, but you can override this by unchecking the Auto checkbox for the coordinate in question to enter your own text.

The automatically assigned values are generally taken by looking at the values entered into the coordinate selector fields of the Position tabs controlling the plot, but the details are determined by the Default Labels selector. This has three options:
The other plot windows effectively use the value/unit policy, but annotations can get rather crowded in the corner plot, so the default here is value, but it can be made even more compact by selecting xn if required.

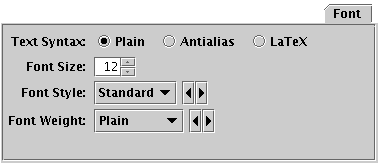
Font Tab
Font tab

Font tab

The Font tab configures the font used for axis annotation. It also affects some other things like the legend.

Text Syntax
How to turn the text into characters on the screen. Plain and Antialias both take the text at face value, but Antialias smooths the characters. Antialiased text usually looks nicer, but can be perceptibly slower to plot. LaTeX interprets the text as LaTeX source code and typesets it accordingly.
Font Size
Size of the font in points.
Font Style
Style of the font.
Font Weight
Whether the font is plain, bold or italic.


Next Previous Up Contents
Next: Time Plot Window
Up: Corner Plot Window
Previous: Corner Navigation

TOPCAT - Tool for OPerations on Catalogues And Tables
Starlink User Note253
TOPCAT web page: http://www.starlink.ac.uk/topcat/
Author email: m.b.taylor@bristol.ac.uk
Mailing list: topcat-user@jiscmail.ac.uk